Showing posts with label marie joerger. Show all posts

Friday, February 13, 2015

iHeart Chevrons quilt pattern is up!!

I'm very excited to have my new quilt pattern 'iHeart Chevrons' up on Craftsy!

The pattern contains instructions and templates for 5 sizes! 24", 36", 48", 60" and 72". 

With this design you can easily add rows to fit any bed as well.  

This is a sample I made using 18 low volume fabrics and 3 reds.


 I was introduced to the Low Volume fabric by Chelsea @ Patch the Giraffe and Michelle @ From Bolts to Beauty.  They hosted a wonderful swap last year and I ended up with 56 of the cutest little low volume squares I've ever seen!  


http://www.craftsy.com/pattern/quilting/other/iheart-chevrons/131590


'iHeart Chevrons' contains Complete instructions, fabric needs, templates PLUS step-by-step tutorial on make multiple 1/2 square triangles and how to use the wonderful Bloc_Loc 1/2 Square Triangle rulers which saves you time and make the most accurate pieces! 


http://www.craftsy.com/pattern/quilting/other/iheart-chevrons/131590


 Special thanks to Susie for testing the pattern!!


Monday, January 19, 2015

Birthday Tote Bag


Birthday Tote Bag.
2014 was a year of many finishes but blogging wasn't one of them.  Through out 2015 I'll add in some to my 2014 finishes.  This is from October 2014.


I picked up some pretty peach fabric to make a tote bag for my sister's birthday.


I made some four patch squares then added triangles to create the front pocket panel.

Here it is trimmed down.
Next I cut one stripe of each fabric and sewed them together then cut them into squares and placed the squares to form this chevron pattern. 
I cut the piece in half using for the front and the back as shown.  I placed the pieces onto Pellon 809 Decor-Bond heavy duty iron-on stabilizer.
 Next the straps were added. (Note of self - Straps should be a bit longer next time!)

 I used canvas for the bottom to help it stay looking clean and make it more durable.
 There's a clasp to keep it closed.
 The inside features a set of pockets plus hook for keys.
 What have you been up to?


Tuesday, July 1, 2014

Octa-Go-Round NHMQG BOM June

Here's the NHMQG BOM for June 2014
(yes, I know it's July!)


Step 1: Cut Background fabric 14” square (will be cut down to 12 1/2” when all applique is done).   Fold background in half 14”x7”, iron, then fold in half 7”x7”, iron, then fold one outside corner to top to make triangle, iron, then tip over and do again with other side, iron.  This should leave you with a square with 1/8 triangles ironed as shown below that you will use to line up your Octagons.


Step 2: Layer 2 pieces of Freezer Paper, draw Octagons Templates onto the Freezer paper and cut out the Freezer Paper Templates.  (I cut the number of  each Octagon needed to make the process quicker—amounts needed are given on each Template.)

You can stack  pieces of fabric then iron freezer paper to top leaving space for seam allowance. (I used 6” squares of each fabric stacked so I could cut several of the  at once.)

Cut Fabric using the Octagon template made from freezer paper adding with 1/2” seam allowance all the way around using your clear ruler and rotary cutter. Remove Freezer paper.
 
Step 3: Take one piece of fabric base bottom/back side facing up.
Take freezer paper with shiny side UP and center on fabric. Fold Octagon side #1 onto freezer paper (see template A for order), iron fabric.  Turn Octagon to side #2 repeat, then repeat until all 8 sides are ironed down.  


I found that I needed a little glue to hold down sides 5 through 8, use sparingly.

Step 4: Leaving freezer paper in, using glue stick, place glue along folded/ironed fabric on back.  
Tip your Octagon over and place your first Octagon into the middle of the 14” square using your ironing lines to center it.  Iron down. 
 
 
Tip the fabric over and iron again.  At this point you can continue to place as many of the 19 Octagons onto the background as you have ready or you can add them one at a time.  *** Allow for space as noted between the Octagons.  I used my eye for what looked good to me. See picture for details.


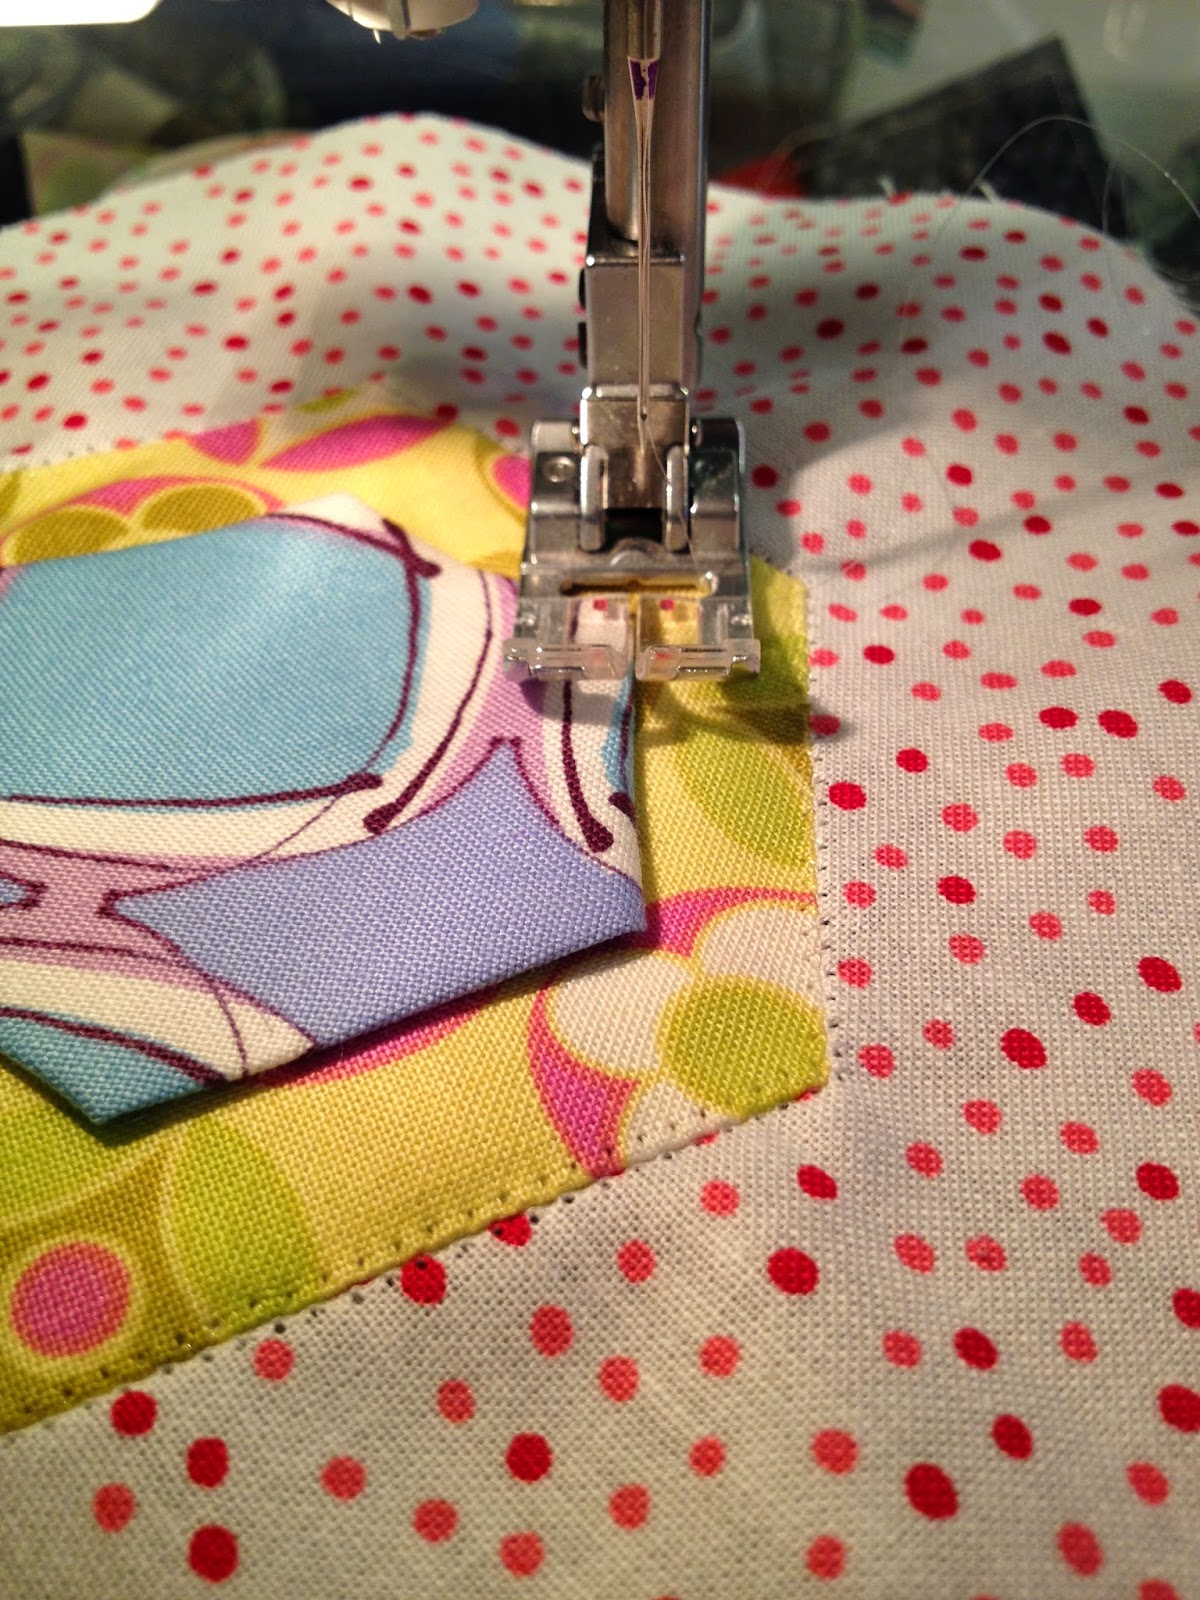
 Step 5: Once your Octagon(s) are ironed down you will machine applique the base Octagons onto the background using Mono-poly Thread. 

***You will work from the biggest to the smallest Octagons removing the Freezer paper as you go.  You should NEVER be sewing into more than one piece of Freezer paper. And NEVER THROUGH THE FREEZER PAPER, only at it's edge.

I use a simple zig-zag stitch set at 1 for width and 2 for length.  Using NEEDLE DOWN is helpful as you pivot the corners.  I set my foot so that the Left stitch is JUST inside the Octagon then the Right stitch is just outside the Octagon on the background fabric.  If you stitch too far in then it will be difficult to remove the freezer paper in the next step.  I always backstitch 3 stitches at the beginning and end of sewing each Octagon down to lock the thread.

https://www.youtube.com/watch?v=Vt0UyIoB4oY&feature=youtu.be

Step 6: Once you have sewn your first layer Octagons onto the background, tip over the block.  Using a seam ripper, make a hole at 1/4”-1/2” from your stitch line.  Take a pair of scissors and continue to cut out the small shape of the Octagon from the background fabric. Pull on the sides of the fabric and the freezer paper Octagon will detach from the stitching.   Remove the freezer paper.  I like to iron the block again before moving to the next step. 


 (Hexie pics shown - same technique)


Step 7: Tip the block back over and using the same steps place the next smaller size Octagons centered on the larger Octagons. Place, sew down, remove the freezer paper.   For the center Octagon which has three layers you will repeat this step again.

Here is my collection of NHMQG - BOM so far
 I'm loving this color scheme :)

BOM #4 is Paper Pieced - demo by Susie B!  
Check back after our July 8th meeting for more details and the pattern!

Tuesday, June 10, 2014

Hexie Go Round Block - Tutorial

As co-VP of the NHMQG I am developing a 9 month BOM.

The Hexie-Go-Round is the 2nd Block in the NHMQG series.
Pattern: Hexie-Go-Round PDF download. 


Step 1: Cut Background fabric 14” square (will be cut down to 12 1/2”).

Fold background in half 14”x7”, iron, then fold in half 7”x7”, iron. Set aside.


Step 2: Layer 2 pieces of Freezer Paper then cut Freezer Paper to the sizes above.  (I cut SEVEN of each hexie to make the process quicker)

Stack 7-10 pieces of fabric then iron freezer paper to top leaving space for seam allowance. (I used 6” squares of each fabric stacked so I could cut all the 3” + all the 2” at once.)


Cut Fabric using the hexie template made from freezer paper adding with 1/2” seam allowance all the way around using your clear ruler. Remove Freezer paper.


Step 3: Take one piece of fabric base bottom/back side facing up.

Take freezer paper with shiny side UP and center on fabric. Fold hexie side #1 onto freezer paper (see picture above), iron fabric.  Turn hexie to side #2 repeat, then repeat until all 6 sides are ironed down.  


Step 4: Leaving freezer paper in, using glue stick, place glue along folded/ironed fabric on back.  Tip your hexie over and place your first hexie into the middle of the 14” square using your ironing lines to center it.  Iron down.  Tip the fabric over and iron again.  At this point you can continue to place as many of the 7 hexies onto the background as you have ready or you can add them one at a time. 


*** Allow 3/4” space all the way around between the hexies.  See picture for details.


Step 5: Once your hexie(s) are ironed down you will machine applique the base hexies onto the background using Mono-poly Thread.  I use a simple zig-zag stitch set at 1 for width and 2 for length.  Using NEEDLE DOWN is helpful as you pivot the corners.  I set my foot so that the Left stitch is JUST inside the hexie then the Right stitch is just outside the hexie on the background fabric.  If you stitch too far in then it will be difficult to remove the freezer paper in the next step.  I always backstitch 3 stitches at the beginning and end of sewing each hexie down to lock the thread.


https://www.youtube.com/watch?v=Vt0UyIoB4oY&feature=youtu.be

 Needle Down / ZigZag 1-width & 2-length


Step 6: Once you have sewn your hexie onto the background, tip over the block.  Using a seam ripper, make a hole at 1/4”-1/2” from your stitch line.  Take a pair of scissors and continue to cut out the small shape of the hexie from the background fabric. Pull on the sides of the fabric and the freezer paper hexie will detach from the stitching.   Remove the freezer paper.


Step 7: Tip the block back over and using the same steps place the 2” hexies centered in the 3” hexies. Place, sew down, remove the freezer paper.


Here's the Hexie-Go-Round in another color! 


Can't wait to see what everyone else uses for colors!

I'll be adding a video of the machine applique shortly. 
I used my iPhone to tape and it's sideways...  Working on correcting that!!
Be in touch!
Marie