Monday, September 29, 2014

Around the World Blog Hop!

Maer over at The Hard-Rock Quilter tagged me to participate in the Around the World Blog Hop.  I met Maer @ an online mug rug swap and was BLOWN away with the beautiful pieces of ART she created for me!!  So much more than Mug Rugs!
http://thehard-rockquilter.blogspot.com/

http://thehard-rockquilter.blogspot.com/


In answer to Sophie over at Sophie Junction's question "does anyone know who started this? and Or why there isn't a nice long list somewhere of everyone who has blogged an Around the World Blog Hop post?"  My answer is no but I think that like she and Kate over at Kate's Quilting, the hardest part of doing this was finding 3 more people to pass it on to. And since there's no master list the thought that if you'd like to play along - do!

Here are the question and my answers:
1) What are you currently working on?
Just finished one block for Sophie's September Block Lotto. Super fun group and I won both January and February this year :)


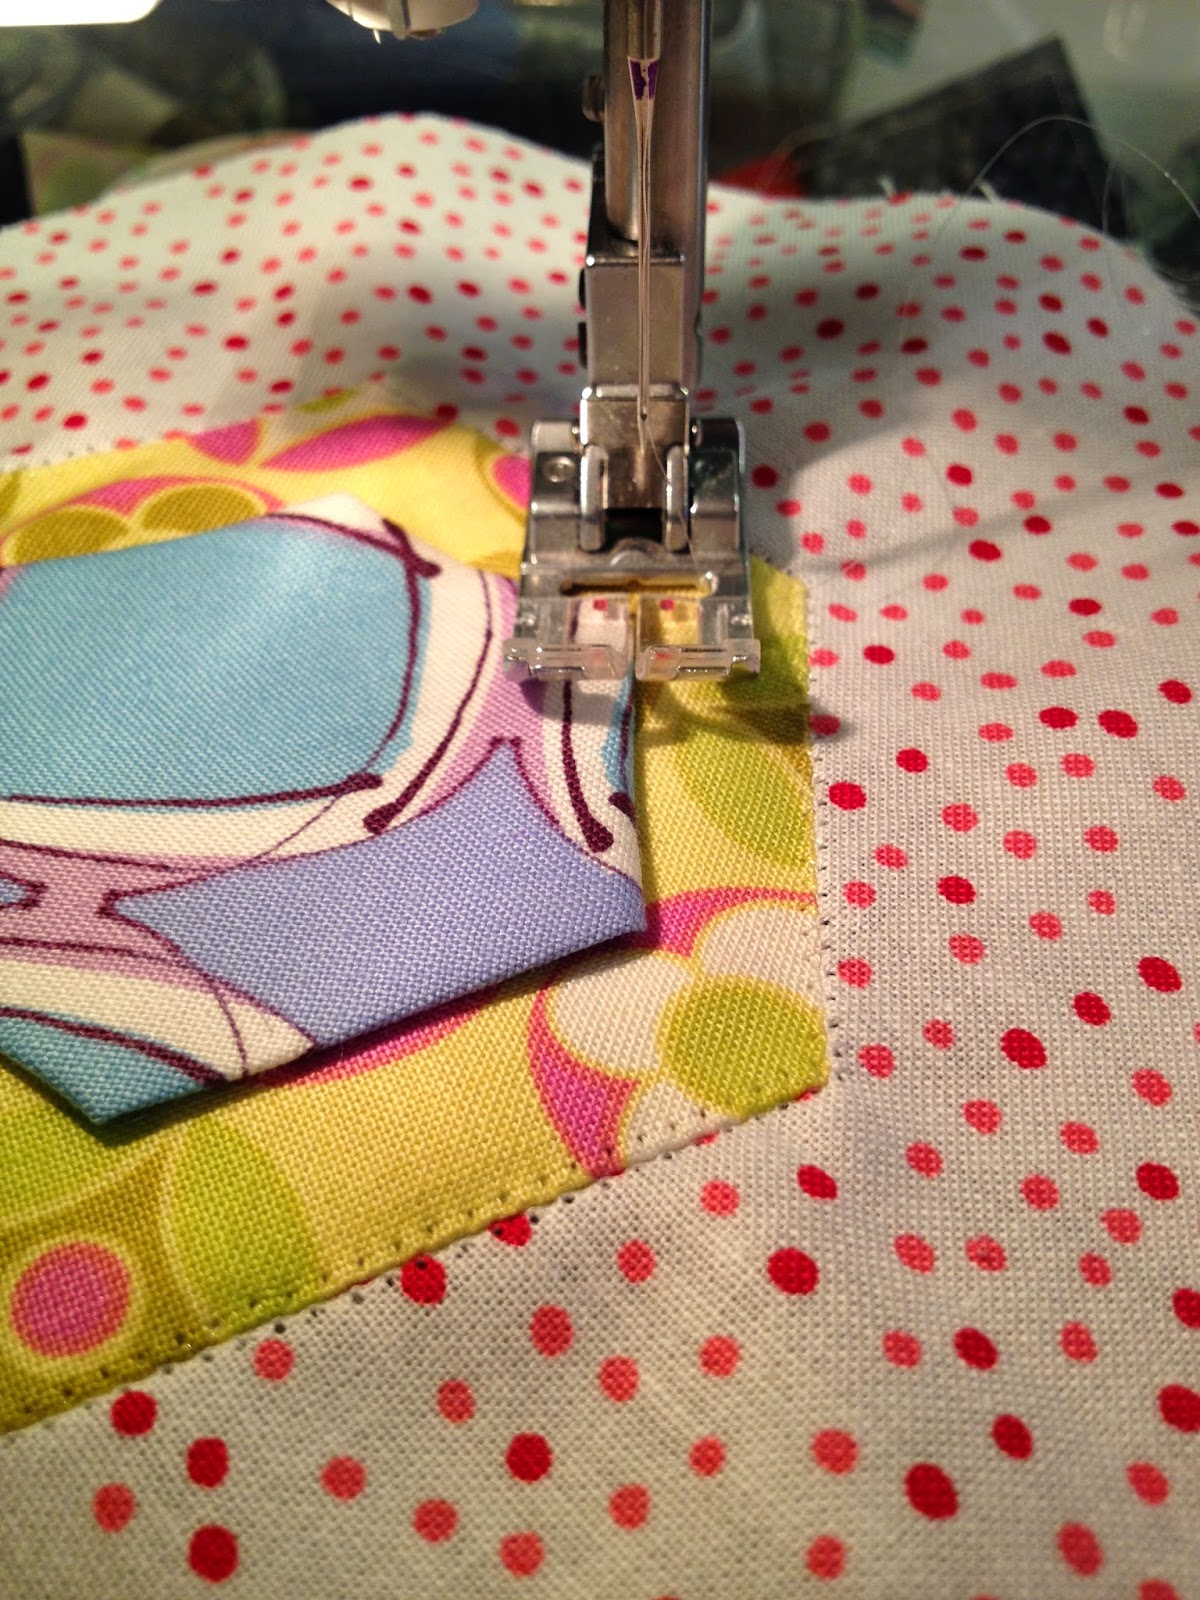
I also just mailed a mug rug to VA for the Two for Teal Mug Rug Swap 2014 which support research for Ovarian cancer.  Can't show the whole thing as it hasn't been received but here's a peek:
 I also finished a challenge for my local guild's 30th Anniversary, which, again I can't show but here's the back - actually had a bit of time to quilt this one myself which is always fun:
here's a peek at the front:


I am also doing Tula Pink's 100 Modern Quilt Blocks with several friends. We are working on blocks 41-80 for a reveal in a few weeks.  No pics but will add some soon.

Mostly I have been working on developing a pattern using 1/2 Rectangle blocks.  I have my 72" sq and 49" sq quilt samples to my friend Lisa to have them long arm quilted and am planning to send out the rough copy to my friend, Susie who has offered to test it for me!  More on that over the next month or so!


2) How does my work differ from others?

I'm not sure that it does.  I like to think that I take things that look very hard and find an easy way to approach it.   I often work from pictures I've seen and seldom use a pattern.  I have patterns & desings 'pop' into my head constantly and grab a piece of graph paper and scribble away.  I have a tendency to jump into a project with an idea and just go with whatever sparks me.  Usually that works out but every once in a while I just make an addition to my UFO pile...  

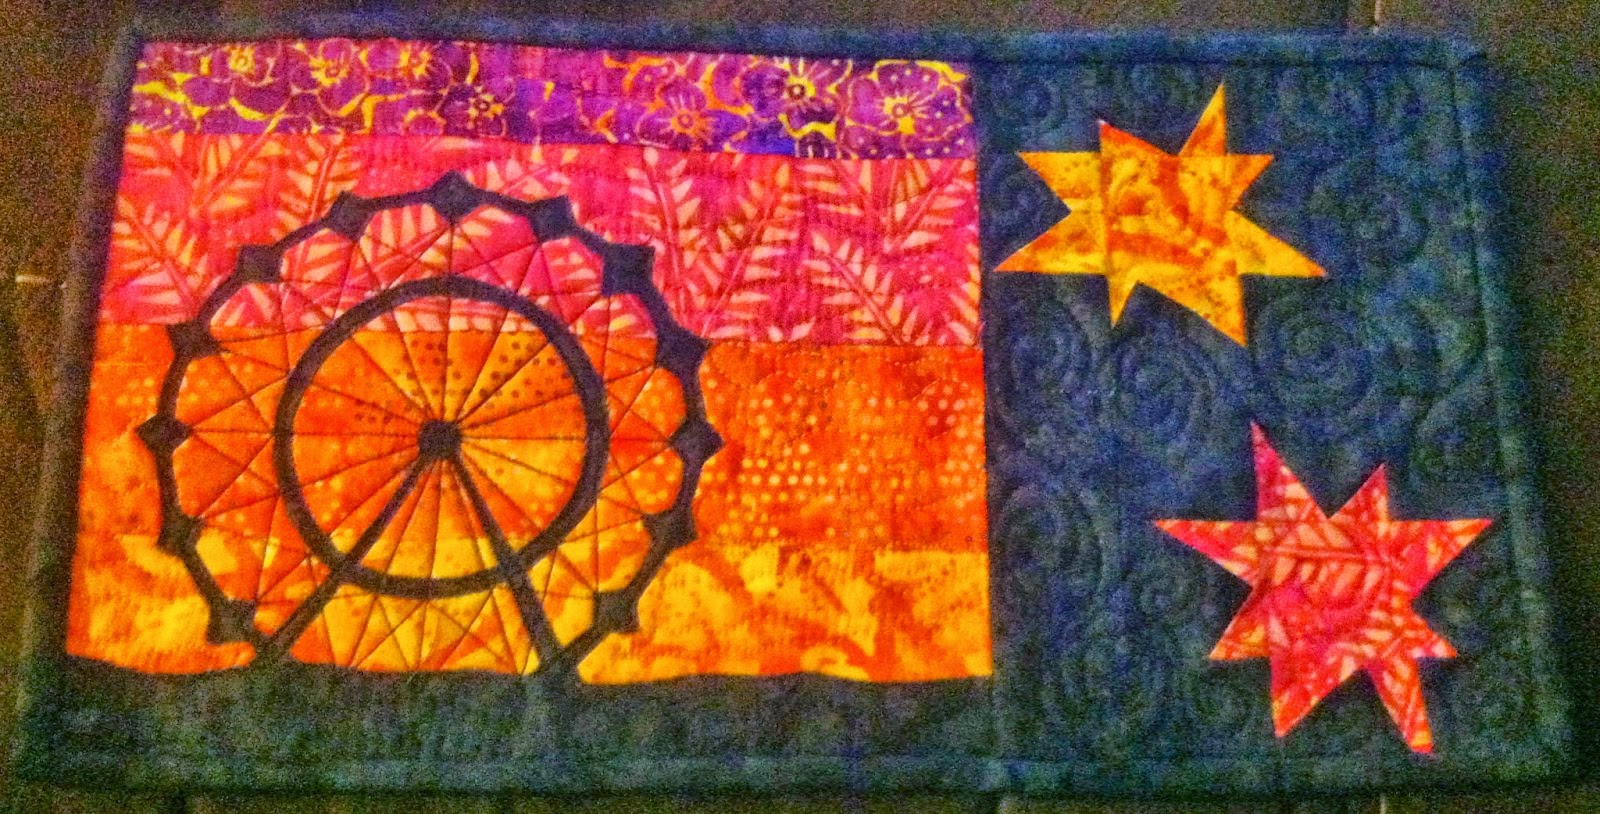
Here's a quilt I recently made for my Creative Conglomeration Group:
For this one I took 2 photos and some clipart - mushed it into the 13" required size and:
(hubby says I made HIS face too fat, LOL, I thought I was the one with chipmuck cheeks!)


3) Why do I write and/or create what I do?

Well, this summer has been very sparse with my blogging but I like to blog to share what I'm up to because people have shown interest it seeing it and have said that I inspire them.  I love that thought and enjoy encouraging others to reach past their comfort zone and try new things! This might be why I enjoy teaching as much as I do.  Blogging also creates a bit of a diary of what I have created, which I find is a nice reference to have.  I also love the interaction with the blogging community. I really enjoy being involved with the many online swap and round robins, etc.  It is fun to be involved with people all over the world while sitting at home.

As I stated above being involved with the online swaps, etc. opens me to interacting with some fantastically creative people.  Never know, some of it may rub off on me :)

4) What is my creative process?
First answer that popped into my head is - depends.  I LOVE to create NEW things!  Love, love, love it!! BUT I bore very easily!  That being said I seldom make an item twice, unless it's a gift item for a group or a Log Cabin which is my favorite 'go to' pattern.  I have notebook after notebook of ideas just waiting for me to have time to turn the thoughts from paper drafts into quilting creations! 

So that's a little about me!  Remember if you haven't been tagged and want to do this...  Go for it!!  As for me, my three 'taggies' are:

Lois Kindley over @ Creative Gypsy -  Lo and I go back 4 1/2 years but it feels like a life time!  She is presently located in Mansfield TX but as her site relates, she is a tumbleweed that landed in my life for a few years and my heart forever!  This is one creative lady!  Don't let the lack of recent blogs stop you, she is just getting over surgery on her 'good' hand and will be back in force soon!  Lo's ramblings will keep you well informed and often in stitches!

Second, head over to Terry Burris @ Terry Burris Quilting.  Terry moonlights as a long arm quilter while still working her day job like me.  I got to know Terry while chairing the last quilt show for SVQG.  She worked magic at getting her wonderful vendors to donate their beautiful products for our raffle baskets!

Next up in Beth of Quilting Hottie Haven.  Beth is running the "Two for Teal" Mug Rug Swap I mentioned above and is a pattern designer and teacher.  I first met Beth when she was a speaker for SVQG then got ran into her again  through the NHMQG.  Fun and interesting blog, check out her!

Promise to blog sooner! M 

Tuesday, July 22, 2014

MQG - Michael Miller Challenge!

Well here it is the last week to enter the MQG's Michael Miller Challenge.

I am delighted to show you my entry....  

The Improv Log
As you can see - it's bigger than me!  The quilt measures 70" square.

It is my original design which I plan to release the pattern for in the middle of August - so check back if you are interested!!

I had planned to quilt this one myself.  I knew exactly how I wanted to quilt it - Stitch in the Ditch around all of the multi colored fabric pieces then 'BUBBLES!' Everywhere else!! (Floating Log Cabin.... Bubbles!) But I ran out of time and still that it is exactly how it came out WITH the expert help of my good friend and long arm quilter Lisa Teichmann of Garden Gate Quilting!!


Heading over to upload the quilt to the MQG site.  If you have a chance go on over to see all the beautiful and exciting creations!!

I'll be linking up with Lee over at Freshly Pieced's WIP Wednesday!  Stop by and see what everyone is up to!


Tuesday, July 1, 2014

Octa-Go-Round NHMQG BOM June

Here's the NHMQG BOM for June 2014
(yes, I know it's July!)


Step 1: Cut Background fabric 14” square (will be cut down to 12 1/2” when all applique is done).   Fold background in half 14”x7”, iron, then fold in half 7”x7”, iron, then fold one outside corner to top to make triangle, iron, then tip over and do again with other side, iron.  This should leave you with a square with 1/8 triangles ironed as shown below that you will use to line up your Octagons.


Step 2: Layer 2 pieces of Freezer Paper, draw Octagons Templates onto the Freezer paper and cut out the Freezer Paper Templates.  (I cut the number of  each Octagon needed to make the process quicker—amounts needed are given on each Template.)

You can stack  pieces of fabric then iron freezer paper to top leaving space for seam allowance. (I used 6” squares of each fabric stacked so I could cut several of the  at once.)

Cut Fabric using the Octagon template made from freezer paper adding with 1/2” seam allowance all the way around using your clear ruler and rotary cutter. Remove Freezer paper.
 
Step 3: Take one piece of fabric base bottom/back side facing up.
Take freezer paper with shiny side UP and center on fabric. Fold Octagon side #1 onto freezer paper (see template A for order), iron fabric.  Turn Octagon to side #2 repeat, then repeat until all 8 sides are ironed down.  


I found that I needed a little glue to hold down sides 5 through 8, use sparingly.

Step 4: Leaving freezer paper in, using glue stick, place glue along folded/ironed fabric on back.  
Tip your Octagon over and place your first Octagon into the middle of the 14” square using your ironing lines to center it.  Iron down. 
 
 
Tip the fabric over and iron again.  At this point you can continue to place as many of the 19 Octagons onto the background as you have ready or you can add them one at a time.  *** Allow for space as noted between the Octagons.  I used my eye for what looked good to me. See picture for details.


 Step 5: Once your Octagon(s) are ironed down you will machine applique the base Octagons onto the background using Mono-poly Thread. 

***You will work from the biggest to the smallest Octagons removing the Freezer paper as you go.  You should NEVER be sewing into more than one piece of Freezer paper. And NEVER THROUGH THE FREEZER PAPER, only at it's edge.

I use a simple zig-zag stitch set at 1 for width and 2 for length.  Using NEEDLE DOWN is helpful as you pivot the corners.  I set my foot so that the Left stitch is JUST inside the Octagon then the Right stitch is just outside the Octagon on the background fabric.  If you stitch too far in then it will be difficult to remove the freezer paper in the next step.  I always backstitch 3 stitches at the beginning and end of sewing each Octagon down to lock the thread.

https://www.youtube.com/watch?v=Vt0UyIoB4oY&feature=youtu.be

Step 6: Once you have sewn your first layer Octagons onto the background, tip over the block.  Using a seam ripper, make a hole at 1/4”-1/2” from your stitch line.  Take a pair of scissors and continue to cut out the small shape of the Octagon from the background fabric. Pull on the sides of the fabric and the freezer paper Octagon will detach from the stitching.   Remove the freezer paper.  I like to iron the block again before moving to the next step. 


 (Hexie pics shown - same technique)


Step 7: Tip the block back over and using the same steps place the next smaller size Octagons centered on the larger Octagons. Place, sew down, remove the freezer paper.   For the center Octagon which has three layers you will repeat this step again.

Here is my collection of NHMQG - BOM so far
 I'm loving this color scheme :)

BOM #4 is Paper Pieced - demo by Susie B!  
Check back after our July 8th meeting for more details and the pattern!

Tuesday, June 10, 2014

Hexie Go Round Block - Tutorial

As co-VP of the NHMQG I am developing a 9 month BOM.

The Hexie-Go-Round is the 2nd Block in the NHMQG series.
Pattern: Hexie-Go-Round PDF download. 


Step 1: Cut Background fabric 14” square (will be cut down to 12 1/2”).

Fold background in half 14”x7”, iron, then fold in half 7”x7”, iron. Set aside.


Step 2: Layer 2 pieces of Freezer Paper then cut Freezer Paper to the sizes above.  (I cut SEVEN of each hexie to make the process quicker)

Stack 7-10 pieces of fabric then iron freezer paper to top leaving space for seam allowance. (I used 6” squares of each fabric stacked so I could cut all the 3” + all the 2” at once.)


Cut Fabric using the hexie template made from freezer paper adding with 1/2” seam allowance all the way around using your clear ruler. Remove Freezer paper.


Step 3: Take one piece of fabric base bottom/back side facing up.

Take freezer paper with shiny side UP and center on fabric. Fold hexie side #1 onto freezer paper (see picture above), iron fabric.  Turn hexie to side #2 repeat, then repeat until all 6 sides are ironed down.  


Step 4: Leaving freezer paper in, using glue stick, place glue along folded/ironed fabric on back.  Tip your hexie over and place your first hexie into the middle of the 14” square using your ironing lines to center it.  Iron down.  Tip the fabric over and iron again.  At this point you can continue to place as many of the 7 hexies onto the background as you have ready or you can add them one at a time. 


*** Allow 3/4” space all the way around between the hexies.  See picture for details.


Step 5: Once your hexie(s) are ironed down you will machine applique the base hexies onto the background using Mono-poly Thread.  I use a simple zig-zag stitch set at 1 for width and 2 for length.  Using NEEDLE DOWN is helpful as you pivot the corners.  I set my foot so that the Left stitch is JUST inside the hexie then the Right stitch is just outside the hexie on the background fabric.  If you stitch too far in then it will be difficult to remove the freezer paper in the next step.  I always backstitch 3 stitches at the beginning and end of sewing each hexie down to lock the thread.


https://www.youtube.com/watch?v=Vt0UyIoB4oY&feature=youtu.be

 Needle Down / ZigZag 1-width & 2-length


Step 6: Once you have sewn your hexie onto the background, tip over the block.  Using a seam ripper, make a hole at 1/4”-1/2” from your stitch line.  Take a pair of scissors and continue to cut out the small shape of the hexie from the background fabric. Pull on the sides of the fabric and the freezer paper hexie will detach from the stitching.   Remove the freezer paper.


Step 7: Tip the block back over and using the same steps place the 2” hexies centered in the 3” hexies. Place, sew down, remove the freezer paper.


Here's the Hexie-Go-Round in another color! 


Can't wait to see what everyone else uses for colors!

I'll be adding a video of the machine applique shortly. 
I used my iPhone to tape and it's sideways...  Working on correcting that!!
Be in touch!
Marie