Hello,
Here in Southern New Hampshire we have started a new Modern Quilt Guild - New Hampshire Modern Quilt Guild. Trish and I are co-VPs which means we get to run programs! We introduced a 12" modern BOM last month using the Modern Quilt Guild's 100 days _ Week of Techniques _ Target Practice Quilt Block
I adapted the block down to a 12" and presented a tutorial on Easy Set-In Circles.
This is the Tutorial for the circles, also known as the 6-minute circle, and there is a video of the sewing at the end.
For this tutorial we will be making a circle in a square.
Supplies:
1 - piece of fabric - outside 8"x8"
1 - piece of fabric - center circle 6"x6"
Iron / Ironing surface
Scissors
Freezer Paper (shining side adheres - iron on dull side)
Acid free glue stick (I like the purple - the color disappears but you can see it as you are working along)
On your ironing surface gather your supplies.
Cut 2 pieces of 8"x8" freezer paper and iron one onto the other.
Doubling up the freezer paper makes it much sturdier and easier to work with.
*Always iron on dull side of freezer paper.
Trace a 5" Circle in the center of the freezer paper and cut it out as shown above.
Iron the freezer paper onto your 8" piece of fabric
(my freezer paper is cut to 7" so that you can see the fabric on this demo.)
Flip the fabric/freezer paper over and iron the fabric side down to be sure that it is well attached.
Flip the fabric/freezer paper back over and pinch the fabric up and cut into the fabric about 1 inch from the freezer paper.
Continue cutting all the way around the circle.
You then begin making cuts from the center to just outside the freezer paper.
NOTE: You do NOT have to go all the way to the freezer paper. I cut to about 1/16" before the freezer paper and you will see in following pictures that the fabric very smoothly folds onto the paper.
Next you take your glue stick and run a LIGHT layer of glue all the way around the circle on the freezer paper.
(Light on the glue as you will be releasing the fabric later and what goes on will have to be taken off!)
You will now take the fabric and carefully pull it up and place it onto the glued area of the freezer paper. Do the first one or two as shown below to get it started. You may find a Purple Thing, or other tool may be helpful, but I usually just use my fingers.
If you look closely at the picture you will see that once you have the first piece of fabric pulled up it pulls the next and so on. Now take your Iron (I use a cotton setting) and working your way around the circle, iron the fabric onto the freezer paper.
Once you have all the pieces ironed to the freezer paper you will run another LIGHT layer of glue onto the fabric (it's ok if it hits the freezer paper but easier in the last step of this project if you don't)
Next line up you 6" square evenly over the 5" opening as shown.
Once you are sure it is centered, iron it down.
Flip over the block and iron the front as well. Look closely at the edge.
If you have any areas that aren't flat now if the time to fix them.
You can easily release the fabric from the freezer paper and replace it if needed.
Once you are happy with your block, lift the front fabric off of the freezer paper but
DO NOT REMOVE THE FREEZER PAPER!
Many tutorials tell you to remove the freezer paper at this point but I leave it in. The freezer paper makes a perfect circle for your sewing needle to sew just inside.
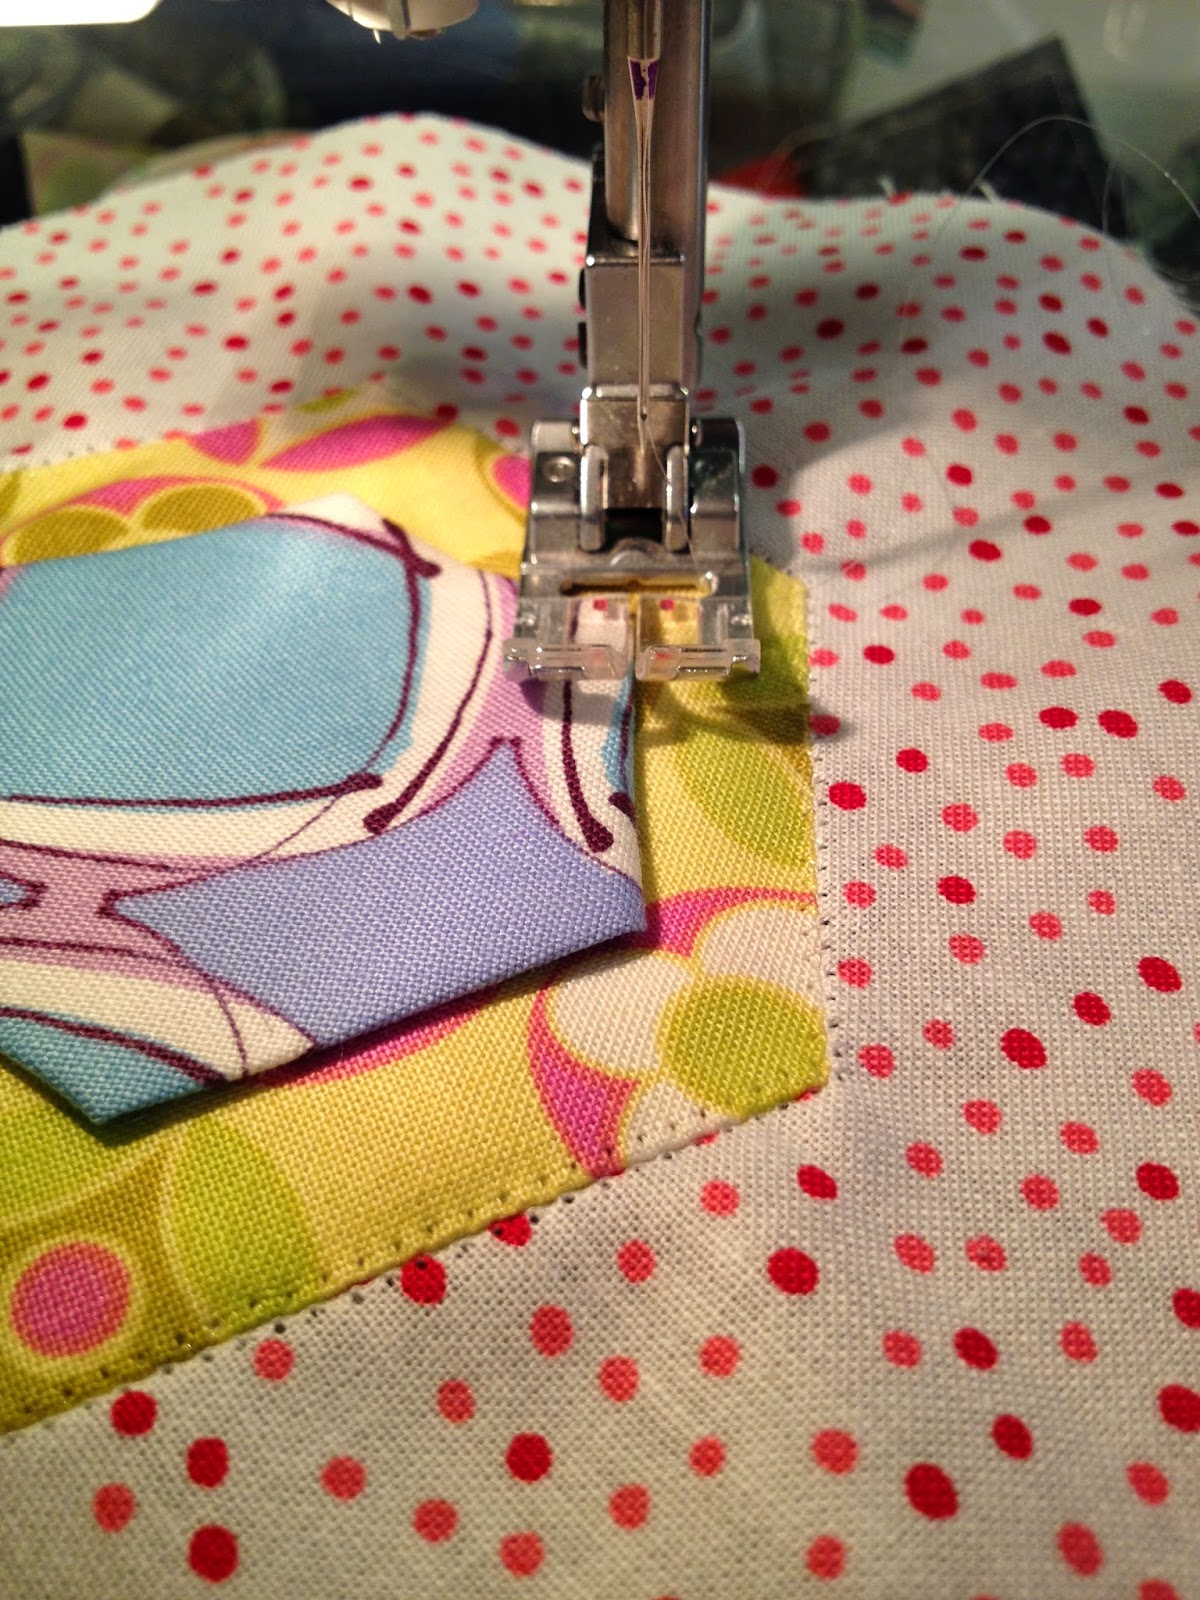
Now you take the circle to your sewing machine.
NOTE: USE NEEDLE DOWN!
Using Needle Down will help you as you are working along to pivot the circle as you go. You will now sew JUST INSIDE the freezer paper.
(If you happen to hit the freezer paper it can easily be pulled out after.)
When you have worked all the way around the circle continue on top of the original thread for an inch or so to lock down the thread.
Now is when you remove the freezer paper. Push the fabric away from the freezer paper until the glue lets go. Work your way around the circle until all of the freezer paper has been released.
TIP: if the paper isn't releasing easily there is probably a lot of glue. Use your iron to heat up the area which will make the paper remove more easily.
Once the paper is out turn over the block and you have your circle!
Iron the circle flat.
The last step is to trim the smaller square and glued fabric to 1/2" from the sewn circle. Be careful to hold the fabric away from the front.
Flip it over, iron it one more time, and you are done!!
Here's a video of the sewing that I thought might be helpful!
VIDEO of sewing the circle:
Here is the information from the BOM & the link to the MQG original block tutorial:
NHMQG - April 2014 BOM
Target Practice
Supplies:
1-14”x14” background fabric
8-6” right triangles (replaces
10”)
8-3” right triangles
(replaces 7”)
2-14”x14” freezer paper sheets
1-acid free glue stick
NOTES - changes from MQG's original version to the NHMQG BOM block:
We will be resizing Target Practice
Quilt Block to 12”x12”. The supplies in
the alternate sizes are listed above.
The web address for the tutorial is:
http://themodernquiltguild.wordpress.com/2012/03/11/100-days-week-of-techniques-tutorial/
Please
note the following changes to the tutorial:
1) 10” convert to 6”, 7” convert to
3”.
2) Skip steps 8 through
11 & use your favorite circle tool or household items that measure 9 ½”-10”
and 4”+-
(I found a plate and candy dish
worked for me)
3) CHANGE - Step 18 – use light
coat of glue stick (see next step below)
4) CHANGE - Step 20 – LEAVE THE
FREEZER PAPER IN! while you sew, AND sew with NEEDLE DOWN just inside the
freezer paper as this makes it much easier to work with. THEN remove the
freezer paper. (You
don’t need heavy glue doing it this way.)
Would love you to add any circles you make to the comments so I can see them!
Huge thanks to hubby Eric for the great pictures and video!!
Marie